Introduction
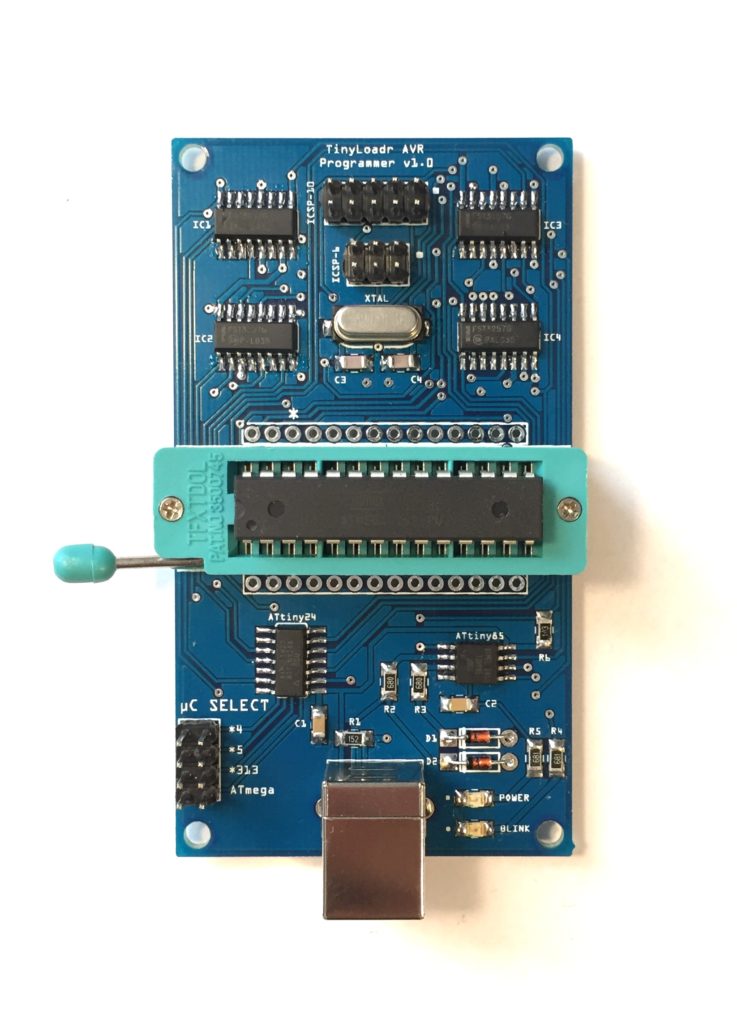
This tutorial will show you how to use the TinyLoadr AVR Programmer to upload code to a DIP microcontroller in the built-in ZIF socket as well as how to upload code to a target PCB with an AVR on it using the ICSP headers.
Note: The first batch of TinyLoadr AVR Programmers used a Mini-USB connector. Newer versions are now using a USB-B connector. These instructions apply to both models.
Drivers
Windows users will need to install the USBtinyISP drivers before they are able to use the TinyLoadr AVR Programmer. You can download the drivers from Adafruit’s website here.
Update: I came across this handy guide for easily installing Windows drivers. Give it a try!
Linux and OS X users do not need to install a driver as it is included with the Arduino IDE / avrdude.
For those who wish to program ATtiny microcontrollers and use the Arduino IDE, you will need to install the proper hardware support files before proceeding. You can find the cores for many popular ATtiny microcontrollers here.
Setting up / connecting the programmer
You can use the programmer in two basic ways – using the on-board ZIF socket, or using the 6 or 10-pin ICSP headers. The ZIF socket is for ATtiny and ATmega microcontrollers in a DIP package, and the ICSP headers are for programming a microcontroller on a target PCB that has an ICSP programming header available.
► Using the ZIF socket
1. Put the programmer in the right mode.
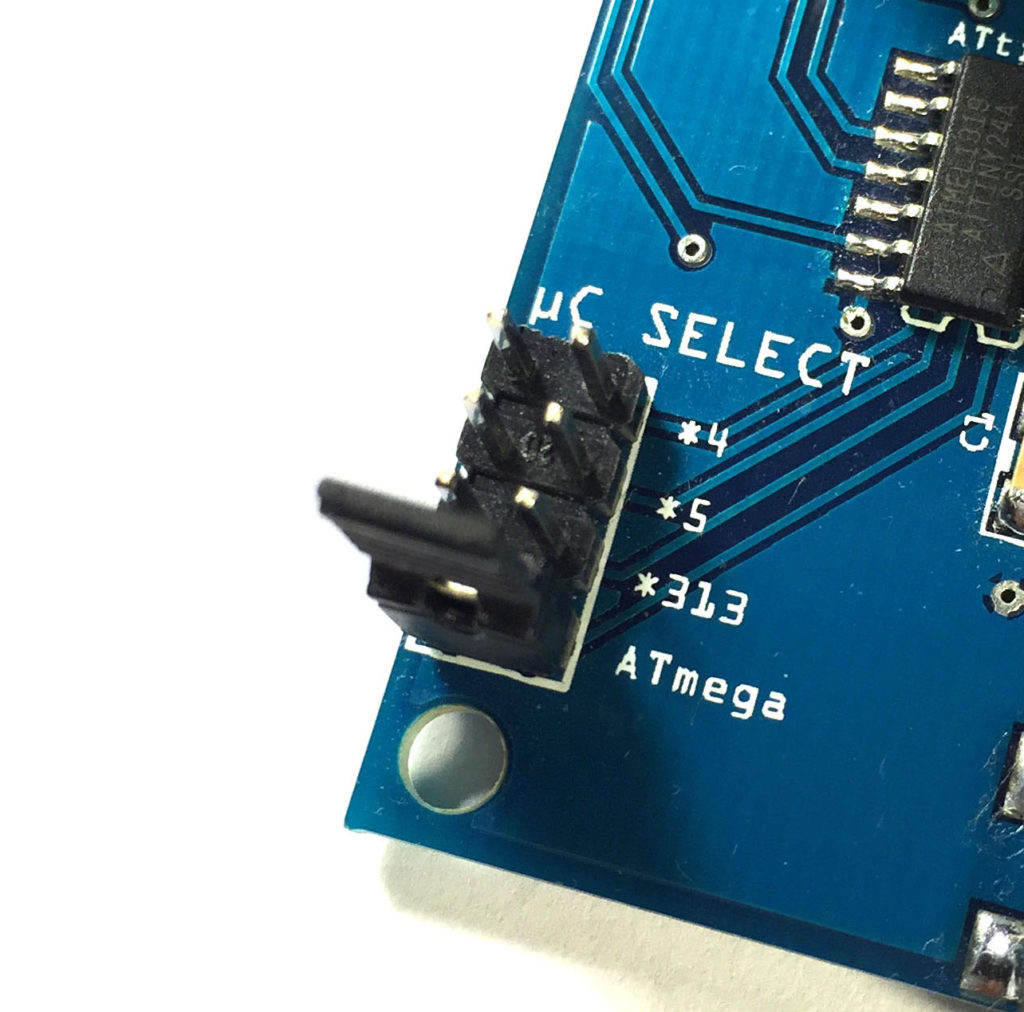
Locate the µC Select jumper and set it to the appropriate setting for the microcontroller you wish to program.
WARNING: Failure to set the jumper properly may result in damage to your microcontroller or the programmer. Please ensure that you have set it properly before inserting your microcontroller.
For an ATtiny24/44/84, or other pin-compatible 14-pin AVR, select *4
For an ATtiny12/13/15/25/45/85, or other pin-compatible 8-pin AVR, select *5
For an ATtiny2313/4313, or other pin-compatible 20-pin AVR, select *2313
For an ATmega8/48/88/168/328 or other pin-compatible 28-pin AVR, select ATmega
2. Put your microcontroller in.
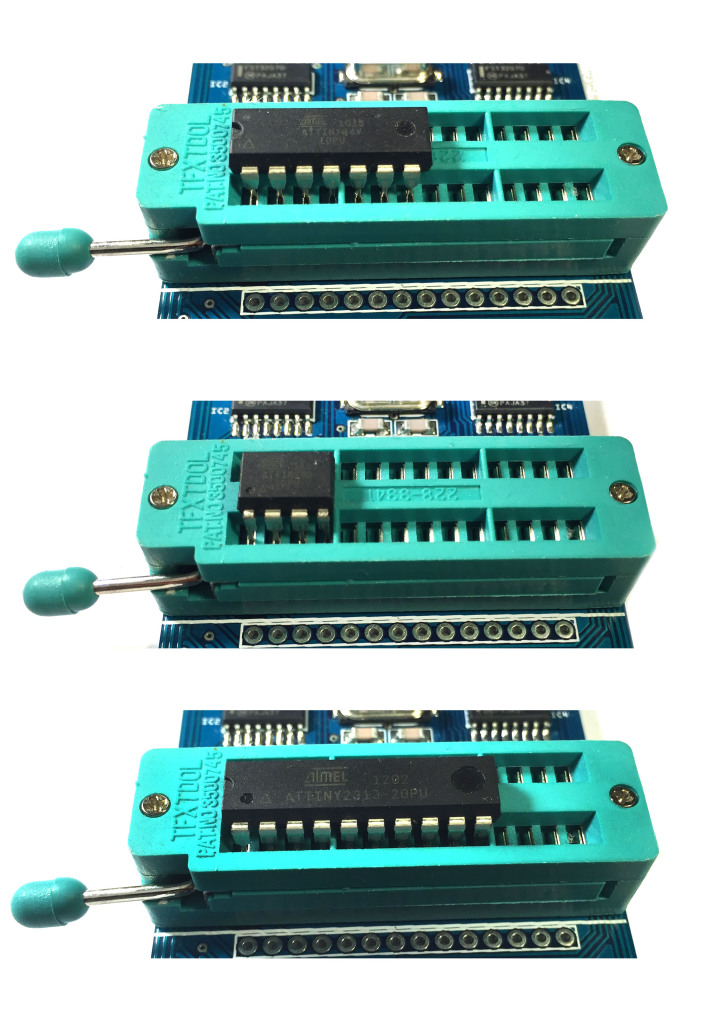
Insert your microcontroller into the ZIF socket, with pin 1 in the left-most contacts. Make sure that the dot or half-circle is facing the LEFT. See the photos below for clarification. Make sure that you insert your microcontroller properly, or you may damage the microcontroller and / or the programmer.
3. Plug it in.
Plug the TinyLoadr AVR Programmer into your computer with the USB cable. You will see the green power LED light up.
► Using the ICSP headers
Note 1: You will need the appropriate 6 or 10-pin ICSP ribbon cable or jumper wires (not included) to connect the TinyLoadr AVR Programmer to your target board.
Note 2: The TinyLoadr AVR Programmer can power your target board with 5VDC through the 6 or 10-pin ICSP headers. The maximum current that the target board can draw depends entirely on how much current the USB port you have the programmer connected to can supply. For most, this is no more than 500mA.
1. Connect your ribbon cable.
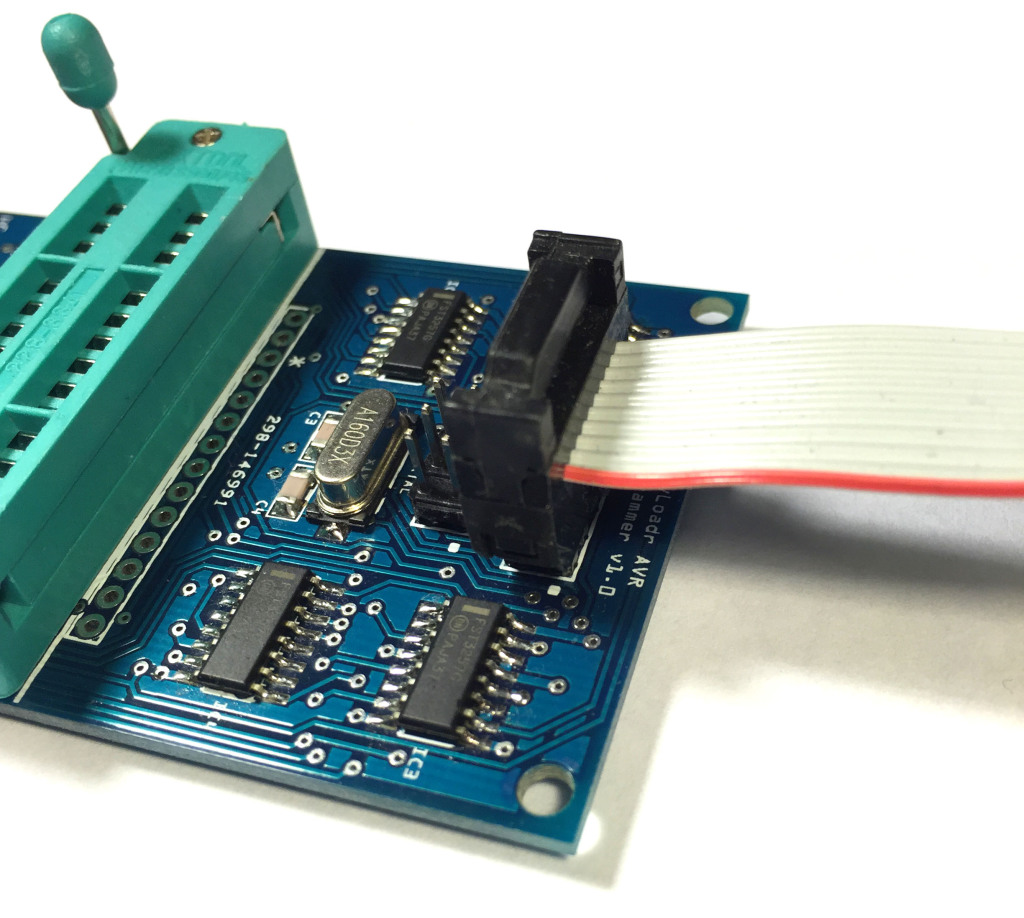
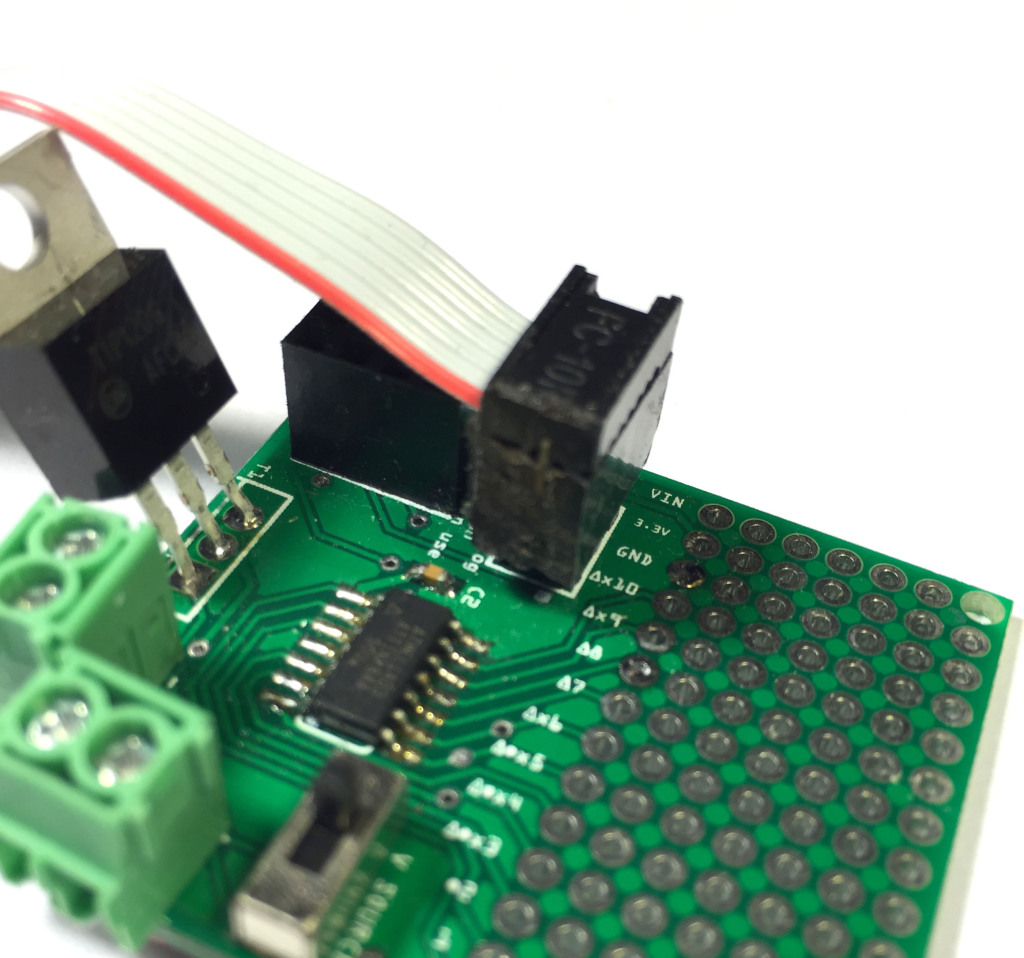
Connect the TinyLoadr AVR Programmer to your target board with your ribbon cable. Pin 1 (MISO) on either ICSP connector is marked by a small white dot.
In general, you will want to align the red line on your ribbon cable with Pin 1 on the connector. This may vary from cable to cable so verify the pinout of your cable with a multimeter before connecting the power.
2. Plug it in.
Plug the TinyLoadr AVR Programmer into your computer with the USB cable. You will see the green power LED light up.
Uploading code
There are many different applications that you can use to upload code to your AVRs. This guide will outline how to do it using two of the more popular methods – using the Arduino IDE and using avrdude. This guide assumes that you’ve followed the previous steps and have a microcontroller in the ZIF socket.
Note for ATtiny microcontrollers: I recommend using the ATtiny cores from the arduino-tiny project. You’re free to use others but the pin mapping on the back of the programmer may not be correct.
► Using the Arduino IDE
Note: If you are using an ATtiny microcontroller then you will need to install the appropriate hardware support files (also called cores) before you will be able to use the Arduino IDE to upload code to them. You can find the cores for many popular ATtiny microcontrollers here.
1. Launch the Arduino IDE
2. Select the programmer.
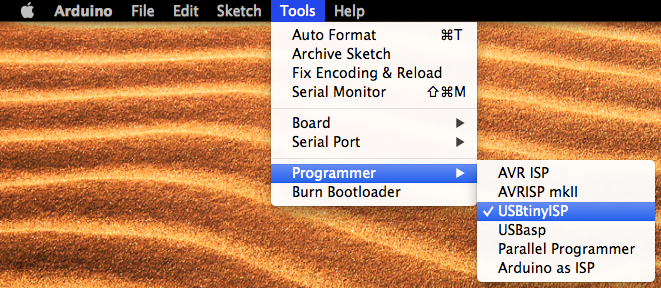
Select “USBtinyISP” under the Tools > Programmer menu.
3. Set the fuses / burn the bootloader.
If you have already set the fuses / burned the bootloader on your microcontroller, then skip to the next step. If this is a completely blank, new microcontroller then you will need to set the fuses and/or burn the bootloader.
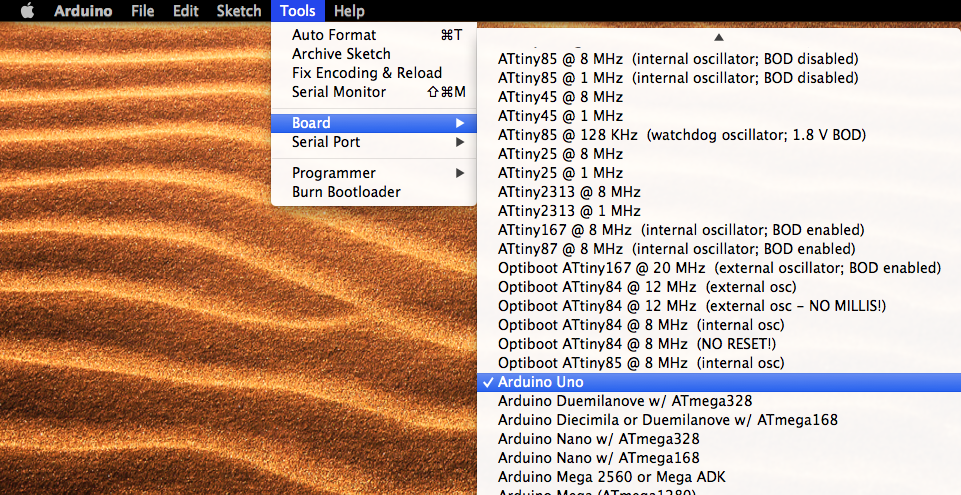
Select the microcontroller you wish to program under the Tools > Boards menu. In this example I am going to use an ATmega328 with an external 16MHz crystal, so I will choose Arduino Uno.
Note 1: The programmer contains a 16MHz crystal which can be used with any of the supported microcontrollers!
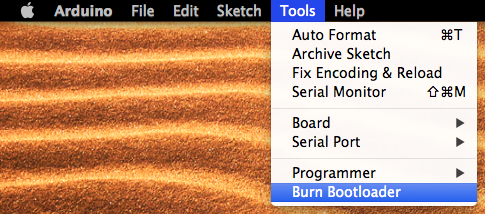
When you’re ready, to to the Tools menu and select Burn Bootloader. This will set the fuses on the microcontroller and (on some AVRs) burn the Arduino bootloader to it. This process can take about 2 minutes on an ATmega328, or more on other ATmega microcontrollers. On ATtiny microcontrollers I’ve found it takes under 10 seconds.
When finished, you will see a confirmation message.
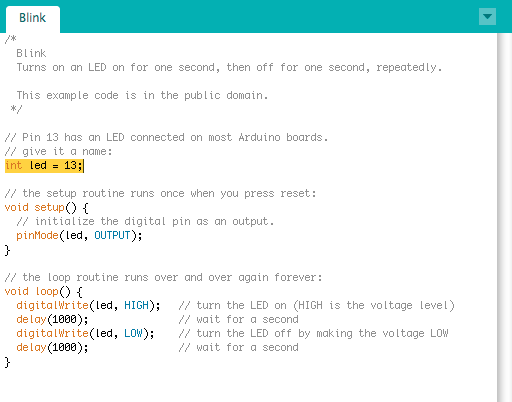
4. Open the Blink example.
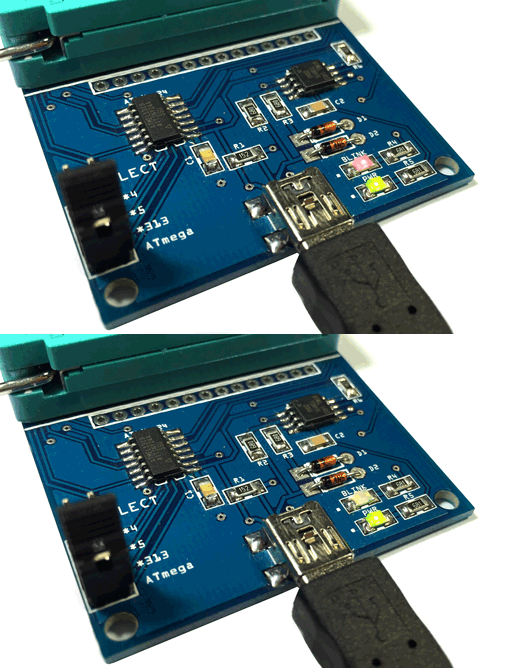
Now we will upload some example code to blink the on-board Blink LED.
Load up the Blink example sketch from File > Examples > 01.Basics > Blink
Note: You could also just download my Blink Example sketch and skip all of this.
5. Look up the Blink pin.
Look up the Blink pin for the microcontroller you’re using on the back of the programmer. In this example I’m using an ATmega328, so that’s digital pin 17. We’ll use this in the next step.
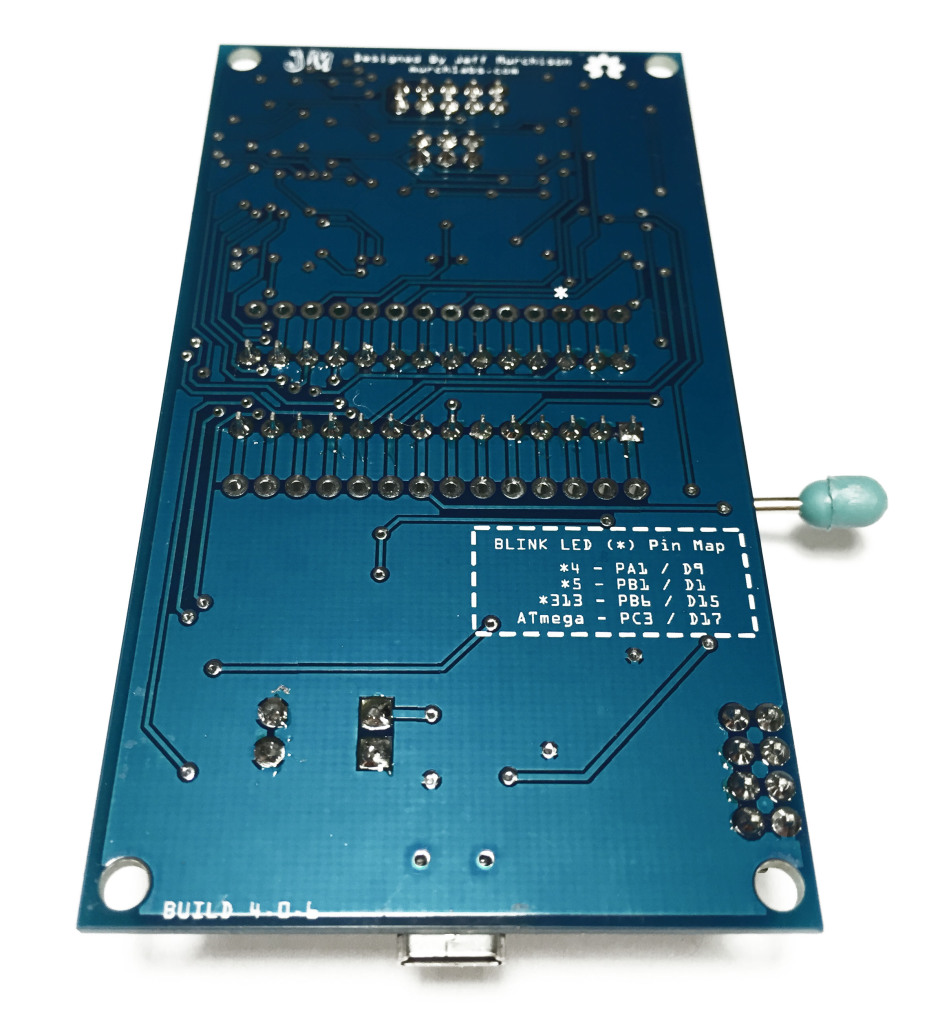
The legend lists both the port number and the Arduino digital pin number. NOTE: these pin mappings are based on the ATtiny cores from the arduino-tiny project. If you’re using other cores then they may not be the same.
6. Change the code accordingly.
Replace the 13 in the following line:
int led = 13;
with the pin number from the previous step.
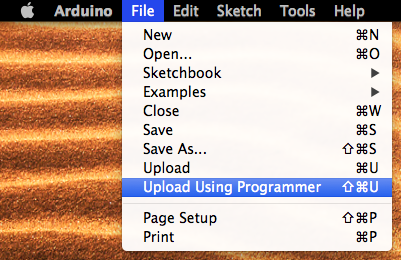
7. Upload the code.
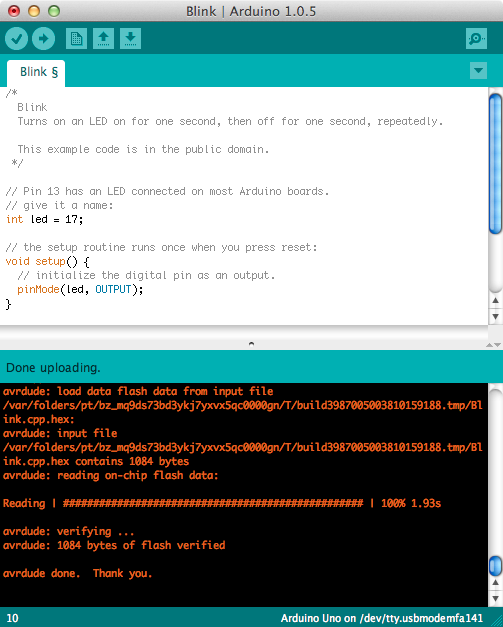
Upload the code to your microcontroller by selecting File > Upload Using Programmer.
When finished, you will see a confirmation message. You should also now see the Blink LED on the programmer happily blinking away.
► Using avrdude
This is not a comprehensive guide on avrdude and is intended for advanced users who already have experience with avrdude. For a more beginner-friendly guide to avrdude, see this guide by Adafruit.
Using the TinyLoadr AVR Programmer with avrdude is very similar to using other programmers. The basic syntax for burning AVR fuses is as follows:
avrdude -c usbtiny -p m328 -e -V -U lfuse:w:0xe1:m -U hfuse:w:0x5d:m -U efuse:w:0xff:m
while the basic syntax for uploading code is as follows:
avrdude -c usbtiny -p m328 -e -V -U flash:w:/path/to/your/file.hex:i
- for the -c argument, use usbtiny as the TinyLoadr AVR Programmer is based off of the USBtinyISP
- for the -p argument, please refer to this list to determine which part no. you should use for the AVR you want to program.
- You can use this fuse calculator to calculate the fuses you are going to use.
Troubleshooting
All TinyLoadr AVR Programmers are assembled, programmed with firmware, and tested before they are shipped. The vast majority of issues that users see are related to improper configuration, setup, or use of the programmer, as opposed to a manufacturing defect.
If you have any issues please read through these instructions again carefully and ensure you have followed them properly. If you are still having issues then I recommend visiting Adafruit’s USBtinyISP FAQ page. If you are still having issues afterwards then please contact me either by leaving a comment or sending me an email. Please try to be as descriptive as possible and list any errors that you see.
